...
The built-in editor allows you to: - With Design view, you can create an email without having to code in HTML.
- With Code view, you can build your email in HTML language.
An alternative, you can work in another application, such as Adobe Dreamweaver or similar, and then copy & paste the HTML code directly in the Code view of the built-in editor. | Tip |
|---|
The built-in editor has numerous useful features, including: |
|  |
...
To personalize your email message insert dynamic fields. Dynamic fields retrieve any information (personal info, preferences, e-commerce data) stored on your list. For example, if your recipient list contains the first names of your recipients you can insert the [First Name] dynamic field as "Dear [First Name]" in the salutation of the email and each recipient will view their first name in the email, such as "Dear John". | Tip |
|---|
To prevent that dynamic fields are left blank because your recipient list does not have that info| title | How To Insert Dynamic Fields |
|---|
| Within the Email Editor, click on the dynamic field button Dyn. Fields (found on the upper-right corner outside the email editor) to set a default value for each dynamic field. Ex) The default value for the [ First Name ] dynamic field can be Valued Customer. (view screenshot). - Now, select from the drop down menu which dynamic tag to add in the current section of your email message.
|
| Tip |
|---|
| title | Recipient Data Fields |
|---|
| To add, edit, and view the recipient data fields go to Settings > Account Settings > Recipient fields. In addition to a set of default fields, including e-commerce specific fields, you can add your own custom recipient data fields. |
| Tip |
|---|
| To edit the default value of the dynamic tags, click on Dyn. fields. - For example, if you don't know the first name of your recipients, the [ first name ] dynamic tag will show as blank. To edit this, click on Dyn. fields and under first name type the corresponding value, such as "friend".
|
| Anchor |
|---|
| profileupdates |
|---|
| profileupdates |
|---|
|
| Tip |
|---|
| To build and update recipient's information within your List, you can use the Profile Updates feature. This feature allows you to create a custom form that your recipients can fill out and update or add their info to your List. For more information on Profile Updates, view this page. |
|  |
...
| Tip |
|---|
For a guide on how to use dynamic content and filters, view this page. |
Adding a Subscribe/Unsubscribe LinkWithin the Email editor, click on the blue subscribe button or the red unsubscribe button (view screenshot) to include the corresponding link to any highlighted text or image in your email.
 Image Added
Advanced Settings
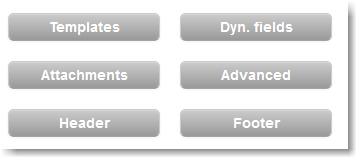
The Advanced Settings allows you to further perform a number of tasks, including: - Viewing and editing templates
- Uploading an attachment to your email message (such as a marketing flyer PDF)
- Editing the header and footer of your email message
Most importantly, the Advanced button, further allows you to enable automated link tracking, which allows you to 1) select that all links in your email will be tracked, useful for the email statistics section and 2) insert a Google analytics campaign tracking code. | Tip |
|---|
| title | Intermediate-Advanced |
|---|
| To learn more about Google analytics campaign tracking view: - MailUp blog article: Google analytics campaign tracking.
- Knowledge base article: Tracking campaign results with Google analytics (or any other web analytics application)
|
| 
|
...