Outlook
You can use SMTP+ as your outgoing mail server in Outlook. Here is how to do so.
- Create a SMTP+ user in your MailUp admin console
- Start Outlook and select File > Account Settings
- Select the account that you wish to edit and click on Change
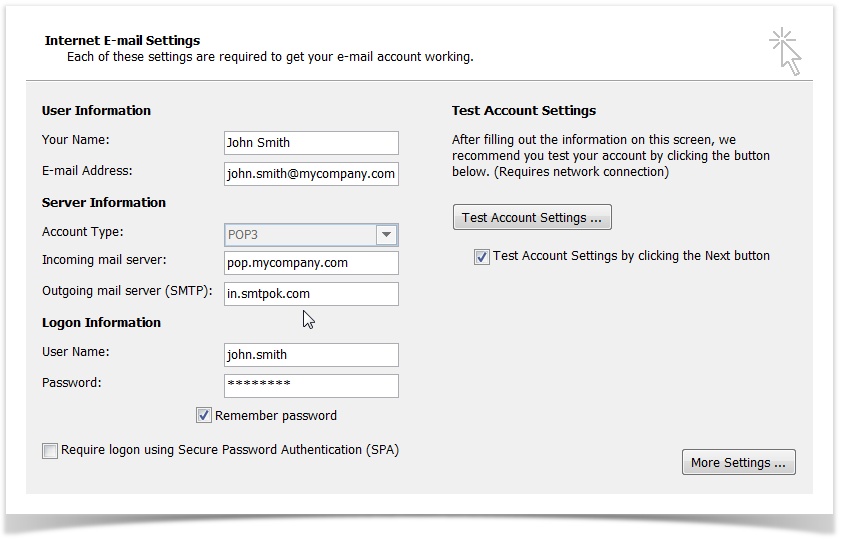
- On the window that is shown to you, enter your SMTP+ server address as the Outgoing Mail Server (e.g. in.smtpok.com).
- Click on More Settings to configure the rest of the settings needed to use SMTP+ as your outgoing mail server
- In the Outgoing Server tab:
- Check the checkbox "My outgoing server (SMTP) requires authentication"
- Select "Log on using"
- Enter your SMTP+ user name and passwords (which you obtained when you added the SMTP+ user in your MailUp admin console)
- Click on "Remember password"
- In the Advanced tab, change the Outgoing server (SMTP): to use a port supported by SMTP+. You can use port 25, which is often the default one for outgoing mail and is supported by SMTP+. In some cases (i.e. with some Web hosting companies) port 25 is disabled. In that scenario, choose another port supported by SMTP+, such as port 2525. A list of supported ports is available under SMTP+ settings.
- Click on OK to save the settings
- Click on Next to save the new outgoing mail server configurations to this Outlook email account.
You are done!
WordPress
Coming soon.
Magento
How to use /wiki/spaces/mailupUserGuide/pages/36503987.
Related articles
- SMTP+ overview
- set the properties for the messages sent using the SMTP+ feature
- configuring SMTP+, server and users
- set and customize the notifications sent by the SMTP+ feature to your users
- view the send status of SMTP+ messages
